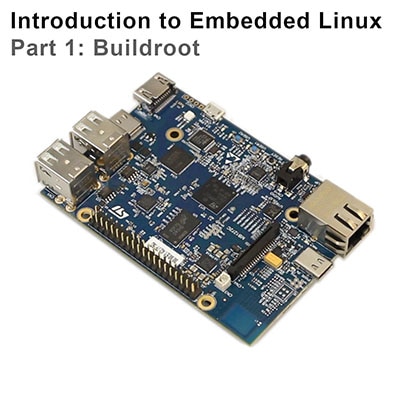
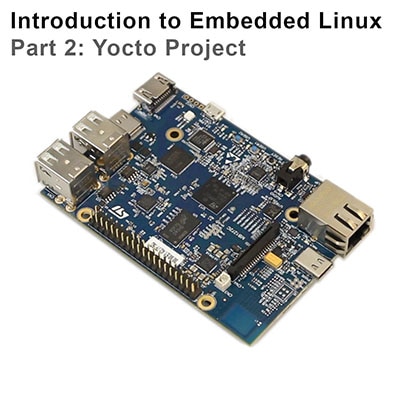
制造商零件编号 STM32MP157D-DK1
DISCOVERY STM32MP157D EVAL BRD
STMicroelectronics
License: Attribution Single Board Computers
In the previous tutorial, we showed you how to flash your built Linux image onto an SD card and then boot into Linux on the STM32MP157D-DK1 board. In this guide, we’ll walk you through the process of creating your own layer in the Yocto project and using it to make changes to the Linux image. Specifically, we will expand the rootfs size (to give you more space for modules, packages, and applications) as well as change the default root password.
See here if you would like to view this tutorial in video format:
Required Hardware
I will try to explain what is happening at each step in these tutorials so that you can generalize the instructions to almost any single board computer (assuming the board is supported by the build system). However, for the demonstration, I will be using the following platform:
You will also need an SD card. The STM32MP157D-DK1 kit should come with an SD card. In addition, you will need a USB-C power supply capable of supplying 5V, 3A.
Required Software
You will need Linux for this project, as all of the tools we are using must be run in Linux (on the host computer). I will show steps that work in Ubuntu and Linux Mint (and likely other flavors of Debian), but you can probably get almost any Linux distro to work. LiveCD, dual-booting, Windows Subsystem for Linux (WSL), and pre-made Docker images will also likely work.
I also recommend using a fairly modern computer with at least 4GB of RAM. While you can probably build a Linux image in a Rasbperry Pi, expect it to take a very long time.
View Default Image Recipes
The poky reference distribution comes with a main image recipe that is used during the bitbake build process in order to construct the Linux image. Feel free to view that recipe here:
cd ~/Projects/yocto/poky/meta
vi classes/image.bbclass
Note that it is a class recipe (.bbclass), which acts as a template for other recipes to import (or “inherit”). Up until now, we have been working with core-image-minimal as our target image. core-image-minimal inherits the core-image class recipe, which can be found here:
vi classes/core-image.bbclass
Feel free to look through that file as well to get a sense of how image recipes are constructed. Specifically, you’ll notice that it calls “inherit image” at the bottom of the file to import the image.bbclass file we just looked at.
Additionally, it assigns various packagegroups to IMAGE_INSTALL, which is an important variable used to tell bitbake what things to include in our image (e.g. what modules and packages to include).
Look at the core-image-minimal recipe to see what was being included in our previous builds:
vi recipes-core/images/core-image-minimal.bb
Notice that this is a recipe (.bb) instead of a recipe class (.bbclass), and it imports (inherit) the core-image.bbclass. It overwrites the IMAGE_INSTALL variable using a hard assignment (‘=’) operator (you can read about bitbake recipe syntax and operators here). With this new assignment, only the packagegroup-core-boot (plus whatever is assigned to CORE_IMAGE_EXTRA_INSTALL) is included. Notably, the packagegroup-base-extended is excluded, as it contains extra packages that go beyond just booting the board. We’ll leave this alone to make our custom image work similary to core-image-minimal.
Additionally, this recipe keeps the root filesystem (rootfs) to around 8 MB, which does not give us much space to install our own packages or applications.
Finally, we’ll want to take a look at the extrausers recipe, as it allows us to add/remove users and groups as well as change passwords in our image (e.g. we use it to set default users, groups, and passwords):
vi classes/extrausers.bbclass
We want to inherit this class if we want to use the EXTRA_USERS_PARAMS variable, which is how we’ll change our default root password. You could update this variable in build-mp1/conf/local.conf, but that would only change things for your current build. To make the change more permanent, you’ll want to add it to a custom layer.
Create Custom Layer
One of the main advantages of working with the Yocto Project is its ability to pull in source material from a variety of places (git repositories, websites, local files, etc.). Most of this is accomplished by keeping files (e.g. metadata, recipes) in “layers.” We previously downloaded the poky and meta-st-stm32mp board support package (BSP) layers.
By creating your own layer, you can easily keep it under version control (e.g. git) so that you can easily configure custom images for future builds. This is especially important if you are creating a product and want to reproduce the full image at any time during production. All you need to do is create a build directory, include your layer (along with other required layers, such as poky and the BSP), and call “bitbake <name-of-image>”.
Start be enabling the OpenEmbedded build environment:
cd ~/Projects/yocto
source poky/oe-init-build-env build-mp1
We’ll then create a custom layer that sits at the same directory level as our other layers:
cd ~/Projects/yocto
bitbake-layers create-layer meta-custom
The “bitbake-layers” tool automatically constructs the appropriate directory structure for our layer and gives us an example recipe in meta-custom/recipes-example/bbexample/bbexample_1.0.bb. Feel free to open and look at that example.
Create Custom Image
Instead of using core-image-minimal, we’re going to write a recipe that builds a custom image (known as “custom-image”). Start by creating the following directory structure:
cd meta-custom
mkdir -p recipes-core/images
Next, we’ll copy in the core-image-minimal.bb recipe to use a starting point and edit it:
cp ../poky/meta/recipes-core/images/core-image-minimal.bb recipes-core/images/custom-image.bb
vi recipes-core/images/custom-image.bb
Change the recipe to the following:
SUMMARY = "My custom Linux image."

IMAGE_INSTALL = "packagegroup-core-boot ${CORE_IMAGE_EXTRA_INSTALL}"

IMAGE_LINGUAS = " "

LICENSE = "MIT"

inherit core-image
inherit extrausers

# Set rootfs to 200 MiB by default
IMAGE_OVERHEAD_FACTOR ?= "1.0"
IMAGE_ROOTFS_SIZE ?= "204800"

# Change root password (note the capital -P)
EXTRA_USERS_PARAMS = "\
  usermod -P 'toor'  root \
  "
Here, we change the summary but keep IMAGE_INSTALL, IMAGE_LINGUAS, and LICENSE the same. Next, we import extrausers in order to modify the default users, groups, and passwords.
We change the rootfs to be about 200 MiB and call usermod in the EXTRA_USERS_PARAMS variable to change the default root password to “toor”.
Note the use of capital P (for the -P argument). Regular usermod (Linux command) uses lowercase -p, but we use a capital P here to force the system to save the root password in plaintext (in our layer on the host machine).
Saving a plaintext password in a custom layer is a potential security risk, especially if you use a public repository (e.g. GitHub) to store your layer. Anyone could find the default password for your device and log in to your device with root privileges. This is how we ended up with the Mirai botnet attack in 2016.
I will show setting a default password as an example, which is useful for development work. For actually deploying a device, you will want to come up with a more secure solution. For example, you could change it to some kind of hash that you print on a label that ships with the device (similar to how many routers provide unique default passwords to their networks and configuration settings).
Save and exit out of the recipe.
Add Layer to Build Process and Remove debug-tweaks
We need to add our custom layer to the build process. Do that with the following:
cd ../build-mp1/
vi conf/bblayers.conf
Add “/home/<username>/Projects/yocto/meta-custom \” to the BBLAYERS variable.
Save and exit out of this file. Next, we need to remove the “debug-tweaks” setting from IMAGE_FEATURES, which allows you to login to root with no password (and it conflicts with the default password we just set). If you set a default password and have “debug-tweaks” set, you will not be able to log in to the root user at all.
You can view the IMAGE_FEATURES variable with the following command:
bitbake -e | grep IMAGE_FEATURES
Here, you can see that “debug-tweaks” is set in IMAGE_FEATURES.
We can remove that by going into conf/layers.conf:
vi conf/layers.conf
Search for “IMAGE_FEATURES” and comment out the EXTRA_IMAGE_FEAURES line as follows:
#EXTRA_IMAGE_FEATURES ?= “debug-tweaks”
Save and exit. Feel free to run `bitbake -e | grep IMAGE_FEATURES` again to make sure that “debug-tweaks” has been removed.
Build and Flash SD Card
Build the custom image with the following:
bitbake custom-image
If everything goes well, you should not see any errors. Plug in the SD card and unmount any partitions that are automounted.
sudo umount /media/<username>/bootfs
sudo umount /media/<username>/rootfs
Copy the bootfs and rootfs images to partitions 4 and 5. Note that we’re using the same bootfs image as before but the rootfs image has changed to custom-image. You will probably need to change the mmcblk# to wherever the SD card is located on your system (find it with the `lsblk` command):
cd tmp/deploy/images/stm32mp1/
sudo dd if=st-image-bootfs-poky-stm32mp1.ext4 of=/dev/mmcblk2p4 bs=1M
sudo dd if=custom-image-stm32mp1.ext4 of=/dev/mmcblk2p5 bs=1M
Mount bootfs (e.g. unplug and plug the SD card back into your host computer). Edit extlinux.conf:
sudo vi /media/<username>/bootfs/mmc0_extlinux/extlinux.conf
Change the location of the rootfs to the specific partition on the SD card:
root=/dev/mmcblk0p5
extlinux.conf should look like the following:
Unmount any partitions.
Test Changes
Plug the SD card into your STM32MP157D-DK1. Run picocom (or any other serial terminal) on your host computer to connect to the dev board:
picocom -b 115200 /dev/ttyACM0
With luck, you should be presented with a login prompt:
stm32mp1 login: root
Password: toor
Check the size of the root filesystem (it should be close to 200 MiB):
df -h
When you’re done, I recommend shutting down with the following (before removing power to the STM32MP157D-DK1:
shutdown now
Recommended Reading
The following material should help you as you continue your embedded Linux journey:
Intro to Embedded Linux Part 5 - How to Enable I2C in the Yocto Project
Intro to Embedded Linux Part 6 - Add Custom Application to Yocto Build
Intro to Embedded Linux Part 7 - Enable WiFi Networking with Yocto
I found the following guides useful when creating this tutorial:
ST has a great workshop series on the STM32MP1 where you can learn more about the hardware, drivers, Linux, etc.
Robert Nelson at Digi-Key maintains a great series of getting started guides with Yocto for various boards that you can view here.