制造商零件编号 STM32MP157D-DK1
DISCOVERY STM32MP157D EVAL BRD
STMicroelectronics
License: Attribution Single Board Computers
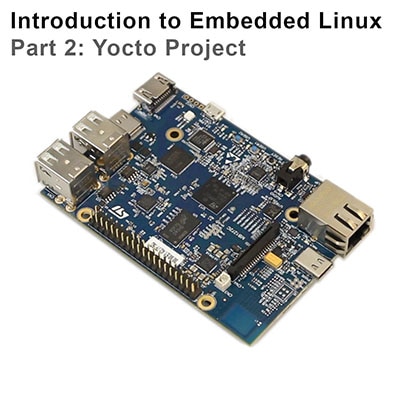
In the previous tutorial, we walked through the process of using the Yocto Project to generate a custom embedded Linux image for the STM32MP157D-DK1 single board computer. That process generated a number of image files, which we then must copy to various partitions on an SD card in order to boot Linux.
This tutorial will walk you through the process of creating the necessary partitions on an SD card and finding which image files to copy to those partitions. See here if you would like to watch this guide in video form:
Required Hardware
I will try to explain what is happening at each step in these tutorials so that you can generalize the instructions to almost any single board computer (assuming the board is supported by the build system). However, for the demonstration, I will be using the following platform:
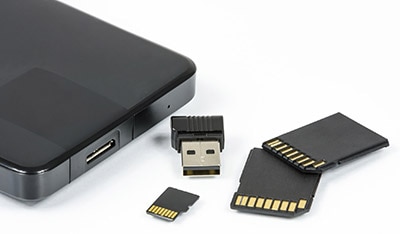
You will also need an SD card. The STM32MP157D-DK1 kit should come with an SD card. In addition, you will need a USB-C power supply capable of supplying 5V, 3A.
Required Software
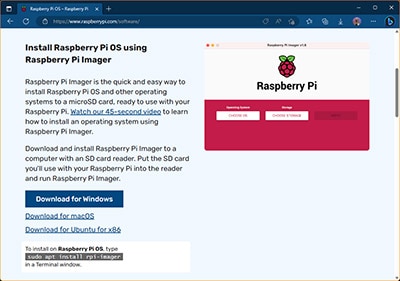
You will need Linux for this project, as all of the tools we are using must be run in Linux. I will show steps that work in Ubuntu and Linux Mint (and likely other flavors of Debian), but you can probably get almost any Linux distro to work. LiveCD, dual-booting, Windows Subsystem for Linux (WSL), and pre-made Docker images will also likely work.
I recommend using one of the distributions listed here, as they are known to work with the Yocto Project.
The Yocto Project requires at least 50 GB of harddrive space to download and build source files.
I also recommend using a fairly modern computer with at least 4GB of RAM. While you can probably build a Linux image in a Raspberry Pi, expect it to take a very long time.
Boot Process
After Yocto finishes building your custom distribution, it should output a number of image files you can flash to non-volatile memory (such as an SD card). However, this process can be very vendor-specific.
Some vendors (and board support packages) will output a single .img file that can be flashed directly to an SD card. It will contain the necessary partitions and files needed to complete the boot process. In other cases (such as our STM32MP1), you will need to configure the partitions manually.
In most cases, booting into Linux requires several bootloader programs to run in sequence. This is known as a “boot chain” or “boot sequence.” For embedded Linux, this process will often look something like this:
ROM > First Stage Bootloader (FSBL) > Second Stage Bootloader (SSBL) > Kernel
Each stage needs to know where to find the next bootloader (in memory). The ROM bootloader is usually hardcoded in the factory and cannot be changed. It will launch the first stage bootloader, such as U-Boot SPL or TF-A, which is in charge of initializing some clocks, DDR memory, and loading the second stage bootloader.
The second stage bootloader initializes other peripherals (such as networking, USB, etc.), finalizing clocks, and loading the Linux kernel. U-Boot is a popular second stage bootloader for embedded Linux.
You will want to carefully read the documentation from your vendor to see how the boot chain works, what the image files are named for each boot process (as well as for the kernel, rootfs, etc.), and how to configure the SD card (or other non-volatile memory). If you are working with an STM32MP1 board, I highly recommend looking through this presentation.
Note: ST has deprecated the use of non-secure (“basic”) bootloaders. As a result, U-Boot SPL is no longer supported. You will need to use TF-A (as the FSBL) and trusted U-Boot packaged with FIP (as the SSBL).
Flash SD Card
ST recommends using their STM32CubeProgrammer to flash the SD card. However, we will do things manually so you can get an idea of how to configure an SD card with the various image files.
Navigate to the output directory for your images:
cd ~/Projects/yocto/build-mp1/tmp/deploy/images/stm32mp1
From here, you can figure out which image files ST would use to flash an SD card by looking at the flashlayout_core-image-minimal/trusted/FlashLayout_sdcard_stm32mp157d-dk1-trusted.tsv file in a text editor. This will show you the name of the image files to use for the FSBL, SSBL, bootfs, and rootfs. Note that we will skip vendors and userfs partitions for now (they are not required to boot into Linux).
Plug an SD card into your host computer and figure out its device file location:
lsblk
For me, the SD card raw device file could be found at /dev/mmcblk2, so I will use that in the following steps.
Make sure to unmount any partitions that were automounted when you plugged in the SD card (e.g. using umount or through the GUI).
Next, we will format the disk to contain the necessary partitions (change mmcblk2 to wherever your SD card can be found):
sudo fdisk /dev/mmcblk2
In fdisk, perform the following actions to format the card:
‘p’ view the partitions
‘d’ to delete a partition
Select one of the partitions
Repeat this process until all partitions have been deleted
If your SD card is not a GPT layout, you will need to change it to GPT.
Type ‘p’ and look at “Disklabel type.” It should say “gpt” (many SD cards come pre-formatted with MBR, which will show up as “dos” in this step).
‘g’ to change the layout to GPT
‘n’ for new partition
Press ‘enter’ to choose the default partition number (will start at ‘1’)
Press ‘enter’ to let fdisk choose the default starting sector (you want the sectors to align with the natural boundaries, otherwise, your partition sizes might be different from what you enter in the next step)
Enter “+256KiB” for the size of the sector
‘t’ to change the partition type
‘11’ for “Microsoft basic data” (used to hold FAT16 and FAT32 partitions)
This creates the first copy of the FSBL partition. Repeat this process to create 5 total partitions:
Partition 1: 256 KiB, (11) Microsoft basic data
Partition 2: 256 KiB, (11) Microsoft basic data
Partition 3: 2 MiB, (11) Microsoft basic data
Partition 4: 64 MiB, (20) Linux filesystem
Partition 5: <rest of SD card space>, (20) LInux filesystem
‘x’ to go into expert mode in fdisk
‘n’ to assign a label to a partition. Name the partitions as follows:
Partition 1: fsbl1
Partition 2: fsbl2
Partition 3: fip
Partition 4: bootfs
Partition 5: rootfs
‘A’ to mark a partition as legacy BIOS bootable
‘4’ to mark the bootfs partition as bootable
‘p’ to view the partition info. The Partition UUIDs and partition sizes might be different from mine.
‘r’ to return to the main menu
‘w’ write changes to the card and exit
You can confirm that the changes were made by entering the ‘lsblk’ command again.
Next, we need to copy the image files to the partitions. Once again, change “mmcblk2” to whatever drive file your host computer lists for the SD card:
sudo dd if=arm-trusted-firmware/tf-a-stm32mp157d-dk1-sdcard.stm32 of=/dev/mmcblk2p1
sudo dd if=arm-trusted-firmware/tf-a-stm32mp157d-dk1-sdcard.stm32 of=/dev/mmcblk2p2
sudo dd if=fip/fip-stm32mp157d-dk1-trusted.bin of=/dev/mmcblk2p3
sudo dd if=st-image-bootfs-poky-stm32mp1.ext4 of=/dev/mmcblk2p4 bs=1M
sudo dd if=core-image-minimal-stm32mp1.ext4 of=/dev/mmcblk2p5 bs=1M
Before we try booting, we need to make one final change. The STM32CubeProgrammer will rename the partition UUIDs (PARTUUIDs) to specific values. U-Boot will look for a particular PARTUUID when trying to mount the root filesystem (rootfs). You can either use fdisk (in expert mode) to change the PARTUUID of rootfs to e91c4e10-16e6-4c0e-bd0e-77becf4a3582, or you can modify the bootfs configuration file to point to the rootfs partition (e.g. mmcblk0p5).
To do the latter, mount the bootfs partition (using the mount command or through your host Linux GUI). Edit bootfs/mmc0_extlinux/extlinux.conf with superuser privileges. For example:
sudo vi /media/<username>/bootfs/mmc0_extlinux/extlinux.conf
Change the APPEND line to the following:
APPEND root=/dev/mmcblk0p5 rootwait rw console=ttySTM0,115200
Note that mmcblk0 is the device file for the SD card according to U-Boot. Partition 5 (p5) is the location of rootfs. If you put rootfs on a different partition number, you will likely need to change this.
Save and exit. Sync the SD card with:
sync
Unmount the bootfs partition (with ‘umount’ or using the GUI). Remove the SD card.
Boot Into Linux
Plug the SD card into the STM32MP157D-DK1 board. Connect a USB micro cable from your host computer to the ST-LINK (CN11) port on the board. On your host computer, enter the following:
picocom -b 115200 /dev/ttyACM0
Note that ACM0 might be different depending on your particular flavor of Linux and any other attached hardware you might have. It should point to the device file for your USB serial port (likely a CDC class) that is connected to the STM32MP157D-DK1.
If everything works, you should see the FSBL (TF-A) post a few lines to the console followed by the SSBL (U-Boot). U-Boot will launch the kernel, and after a few seconds, you should be presented with a login prompt. Enter “root” (no password) to gain access to Linux.
You might see a few messages from the kernel arrive after you receive the prompt. You can just ignore them for now.
Recommended Reading
The following material should help you as you continue your embedded Linux journey:
Intro to Embedded Linux Part 4 - Create Custom Layer and Image in Yocto
Intro to Embedded Linux Part 5 - How to Enable I2C in the Yocto Project
Intro to Embedded Linux Part 6 - Add Custom Application to Yocto Build
Intro to Embedded Linux Part 7 - Enable WiFi Networking with Yocto
ST has a great workshop series on the STM32MP1 where you can learn more about the hardware, drivers, Linux, etc.
Robert Nelson at Digi-Key maintains a great series of getting started guides with Yocto for various boards that you can view here.