In our previous tutorials, we focused on creating basic features using sketches with the Pad and Pocket tools. We also explored how to extend sketches using pattern tools and applied Boolean operations to combine or subtract parts efficiently. Now, we're going to delve into more advanced tools in FreeCAD—Revolutions, Pipes, and Lofts. These tools enable you to create complex, organic shapes that are difficult to achieve with basic operations.
As a practical application, we'll design a custom keycap for a mechanical keyboard. This project will involve using the Pipe tool to create rounded surfaces and the Loft tool to design the top of the keycap. Along the way, we'll also demonstrate how to use the Revolve and Subtractive Pipe tools.
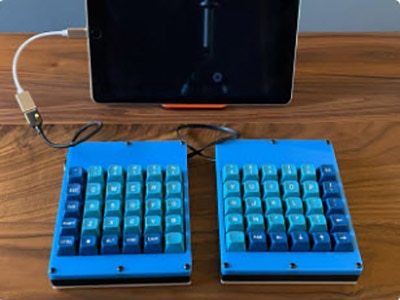
It’s not a problem if you do not have a mechanical keyboard! Feel free to follow along anyway and skip the printing part.
1. Introduction to Advanced Tools
FreeCAD offers powerful features that allow you to create complex and organic shapes. In this tutorial, we'll focus on three advanced tools:
Revolve Tool: Creates a 3D object by revolving a 2D sketch around an axis.
Pipe Tool: Sweeps a 2D profile along a path to create tubular structures.
Loft Tool: Generates a shape by interpolating between multiple cross-sectional sketches.
Understanding these tools will significantly expand your modeling capabilities in FreeCAD.
2. Understanding the Revolve Tool
Before diving into our keycap design, let's explore the Revolve tool.
Steps:
Open FreeCAD and Create a New Document:
Switch to the Part Design workbench.
Click Create New Document and Create Body.
Create a Sketch:
Click Create Sketch and select the XZ plane.
Use the Polyline tool to draw a cross-sectional profile of the object you want to revolve.
Draw a shape resembling a profile of a vase or a knob.
Feel free to fully constrain your sketch using dimensions and constraints.
Add a Datum Line (Optional):
If you want to revolve around an axis that's not the default Z-axis, create a Datum Line.
Adjust its position under Property > Placement.
Select one of the points on the inside of your sketch for Reference 1.
Select the Z axis as Reference 2.
This should attach the datum line to the inside of your sketch in a vertical orientation.
Offset the Datum Line
Click on the DatumLine in the Tree View
Set the Attachment > Position > x to -2 mm
Use the Revolve Tool:
Select your sketch.
Click the Revolve icon.
In the Revolution parameters:
Set the Axis to the desired one (e.g., the Datum Line).
Set the Angle to 360° for a full revolution.
Click OK to generate the revolved shape.
The Revolve tool is ideal for creating symmetrical objects like knobs, vases, and wheels.
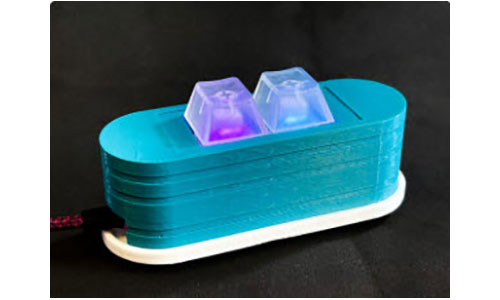
3. Designing the Custom Keycap
Now, let's design a custom keycap for a mechanical keyboard using the Pipe and Loft tools.
Close the previous document and switch to the Part Design workbench.
Click Create New Document and Create Body.
Create the First Sketch (Cross-Section):
Click Create Sketch and select the XZ plane.
Use the Polyline tool (press G and M) to draw the side profile of the keycap.
Start from the origin and draw the bottom edge.
Press M to switch to arc mode for curved edges.
Complete the profile by closing the shape.
Constraints:
Apply horizontal and vertical constraints where appropriate.
Set dimensions based on your keycap specifications (e.g., height, width, arc radii).
Ensure the sketch is fully constrained.
Create the Second Sketch (Path for Pipe):
Click Create Sketch and select the XY plane.
Note: We'll adjust its position later.
Use the External Geometry tool to bring in reference lines from the first sketch.
Draw a Rounded Rectangle representing the path for the pipe.
Set the fillets (corner radii) as needed (1 mm)
Constraints:
Use symmetry constraints to center the rectangle.
Set equal constraints for width and height if creating a square.
Assign dimensions for the rectangle size and fillet radii.
Adjust the Second Sketch Position:
We need the path sketch to align with the top of the keycap profile.
Go to the second sketch's Properties > Placement.
Set the Z position to match the height of the keycap profile.
You can do this numerically or by naming the height constraint in the first sketch.
Using the Pipe Tool
Steps:
Create the Pipe (Additive Pipe):
Order Matters: Select the profile (cross-section) sketch first, then the path sketch.
Hold Ctrl and select both sketches in the tree view.
Click the Additive Pipe icon.
In the Additive Pipe dialog:
Keep Orientation Mode as Standard.
Leave other settings as default.
Click OK to generate the pipe.
Fill the Top of the Keycap:
Select the previous sketch (sweep path).
Click Pad and set the length to match the Top Thickness (e.g., 2 mm).
Adding the Stem
Steps:
Create the Stem Sketch:
Select the bottom face on the underside of the keycap.
Click Create Sketch.
Use the Polyline tool to draw the stem profile.
This is the part that connects to the keyboard switch.
Constraints:
Apply horizontal and vertical constraints.
Use symmetry constraints for balance.
Set dimensions based on standard keycap stems (refer to datasheets if available).
Ensure the sketch is fully constrained.
This might require measuring your particular keyboard and some trial-and-error.
Pad the Stem:
Close the sketch.
Click Pad.
Set the pad length to reach the desired depth within the keycap (e.g., subtracting top thickness and leaving a gap).
4. Enhancing the Keycap with Ribs
Adding ribs inside the keycap can strengthen the structure and improve durability.
Steps:
Create Rib Cross-Section Sketch:
Select the inner face where you want to add a rib.
Click Create Sketch.
Use the Rectangle tool to draw a rib shape.
Constraints:
Attach the rectangle to relevant edges using the Coincident constraint.
Set dimensions for the rib width and height.
Close the sketch.
Pad the Rib:
Click Pad.
Choose Symmetric to Plane to center the rib.
Set the pad length (e.g., 2 mm).
Apply Polar Pattern:
Select the rib pad feature.
Click the Polar Pattern icon.
Set the Axis to the Z-axis.
Set the number of occurrences (e.g., 4 for four ribs).
Click OK.
5. Designing the Top with the Loft Tool
The Loft tool allows us to create a smooth, organic shape on top of the keycap. The Loft tool takes two or more consecutive sketches and attempts to interpolate a solid between them.
Steps:
First Loft Sketch:
Select the top face of the keycap.
Click Create Sketch.
Draw a shape (e.g., a teardrop) using circles and lines.
Constraints:
Use tangent constraints to smooth the connections.
Trim any unnecessary edges.
Don’t worry about fully constraining this sketch, as it’s fairly organic (think of it like sculpting).
Close the sketch.
Copy and Modify Sketches:
Right-click the first loft sketch and select Copy.
Right-click in the tree view and select Paste to create a duplicate.
Drag the new sketch into the active Body.
Adjust the Z position of the new sketch (e.g., raise it by 0.5 mm).
Edit the sketch to slightly modify the shape (e.g., make it smaller).
Repeat:
Repeat the copy-paste-adjust process to create additional sketches at higher Z positions.
Each time, modify the sketch to gradually change the shape.
Create the Loft:
Select all the loft sketches in order (e.g., using ctrl-click). Note that the order matters!
Click the Additive Loft icon.
In the Additive Loft dialog:
Ensure the sketches are listed in the correct order.
Uncheck Ruled Surface to create smooth/curved transitions.
Click OK to generate the lofted shape.
Apply Polar Pattern to Loft (Optional):
Select the loft feature.
Click the Polar Pattern icon.
Set the Axis to the Z-axis.
Set the number of occurrences (e.g., 4).
Click OK.
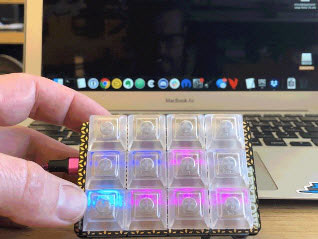
6. 3D Printing and Testing
With the STL file ready, we'll prepare it for 3D printing and test the keycap. As we’ve done in previous episodes, save your project and export the Body as an STL file. Import that file into your slicer, add a support structure (if needed), and send it to your printer. If you generated support, you might have to clean it out with needle-nose pliers. With some luck, your keycap should be ready for use!
Challenge
Try creating your own custom keycap or a different object using the tools learned.
Ideas:
Custom Designs: Add symbols, logos, or text to the keycap using the Loft tool.
Alternative Objects: If you don't have a mechanical keyboard, design a custom knob for a device or appliance.
Experiment with Shapes: Use the Revolve and Pipe tools to create vases, lampshades, or decorative items.
Share Your Work:
Take a screenshot or photo of your design or printed part.
Share it on social media platforms like X (Twitter), Instagram, or LinkedIn.
Use the hashtag #DKFreeCAD and tag @DigiKey to connect with the community.
Conclusion
In this tutorial, we've explored advanced tools in FreeCAD to create complex and organic shapes. By designing a custom keycap, we've learned how to:
Use the Revolve tool to create symmetrical 3D objects.
Apply the Pipe tool to sweep profiles along paths.
Employ the Loft tool to generate smooth transitions between multiple sketches.
Enhance designs with internal structures like ribs for added strength.
These tools open up a world of possibilities in your 3D modeling projects, allowing you to bring intricate and creative designs to life.
What's Next?
In our upcoming tutorials, we'll dive deeper into organic, curved shapes, enabling you to tackle even more complex modeling challenges.