制造商零件编号 SC1176
SBC 1.0GHZ 4 CORE 512MB RAM
Raspberry Pi
License: See Original Project Single Board Computers Raspberry Pi SBC
Courtesy of Pimoroni
Guide by Pimoroni
Clipper HAT Mini is a straightforward way of giving your Raspberry Pi the power to chat with 4G LTE mobile/cellular networks. This guide will show you how to set it up!
What You'll Need
A Clipper HAT Mini. These instructions should also work if you're using a Clipper breakout with your Raspberry Pi, but you'll have to figure out your own wiring.
A data-capable SIM card
An antenna
Assembly
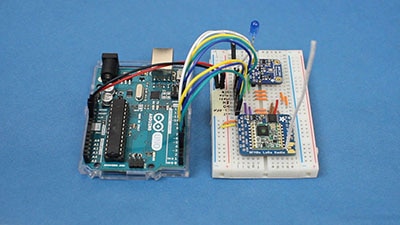
Connect the antenna, insert the SIM, and press the HAT firmly down onto your Pi's 40-pin header. Here's what that looks like on a Raspberry Pi Zero 2 W:
If you wanted to fasten the HAT in place securely, you could add a couple of these 10mm standoffs.
Here's what it looks like on a Raspberry Pi 5 that's fully loaded with an Active Cooler and NVMe Base. We've used some extended 17mm standoffs and a booster header to make enough of a gap for the cooler.
You'll need to be running Raspberry Pi OS (Desktop or Lite) on your Pi. If you choose Lite, we'll assume you're a Linux wizard and can work around any hiccups in these instructions.
Configure Serial
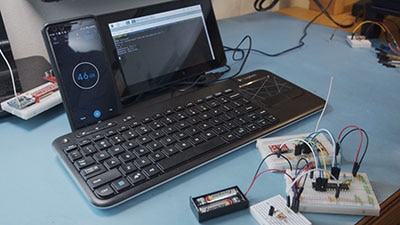
Fire up your Pi, the NET and STATUS lights on your Clipper should light up and the NET light should start blinking.
Open a Terminal (Ctrl-Alt-T or find it in the Raspberry Pi OS menus). Alternatively, you could SSH in from another computer if that's your preference.
Run:
sudo raspi-config
And select Interface Options -> Serial Port.
Say NO to enabling the login shell at startup and YES to enabling the serial port.
Exit, and reboot so your serial port configuration takes effect.
Initial Test
Now let's check things are connected and working properly.
Once again, open a Terminal (or SSH in) and install minicom:
sudo apt install minicom
And then connect to your Clipper HAT:
On a Pi 5, that looks like this:
minicom -b 115200 -D /dev/ttyAMA0
If you're using a different version of Pi, you may need to do:
minicom -b 115200 -D /dev/ttyS0
Now you should be able to type "AT" and hit Enter.
If everything is working, you should see an "OK" response pop up in minicom!
Press Ctrl+A and then X and select "Yes" to leave minicom. It's time to enable PPP!
Setting Up PPP
You know the routine, open up a terminal (it's open from the last step, right?) and copy the reference configuration to a new clipper config like so:
sudo cp /etc/ppp/peers/provider /etc/ppp/peers/clipper
Edit your new config:
sudo nano /etc/ppp/peers/clipper
In nano you'll want to:
Pop an # before the user line to comment it out, we won’t need this!
On the 'connect' line, replace pap with gprs.
On this same line, replace the ******* with your apn, for our 1nce sim this would be iot.1nce.net.
Change /dev/modem to /dev/ttyAMA0 (or /dev/ttyS0).
At the end of the file, add the line nocrtscts to disable hardware flow control (RTS, and CTS).
Add the line local to disable modem control lines (CD, and DTR).
That's everything, press Ctrl+X to exit nano and 'Y' to save your chances, it's time to test PPP!
Enabling & Testing PPP
Still in your Terminal (or SSH session) fire up Clipper with the following command:
sudo pon clipper
If you wish, you can list all the available network interfaces with ifconfig.
Finally test your connection to the internet with:
ping -I ppp0 1.1.1.1
This will ensure your ping attempt is routed via PPP rather than any other network connection you might be using.
This might take a minute or so to start returning results. If it takes a while, try moving your antenna and making sure you're in a good signal position.
Troubleshooting
unrecognized option '/dev/ttyAMA0' when running sudo pon clipper
This is the Clipper configuration looking for a specific serial port, make sure serial is enabled and use ls /dev/tty* to check it's available.
That's all folks!