Embedding Objects Inside a 3D Print
2025-03-03 | By Don Johanneck
Fasteners / Standoffs Addressable LEDs 3D Printing Filament
When designing 3D prints, you may have wondered about embedding fasteners, bearings, or lighting such as addressable LED strips, which add a bit of flare while also providing general lighting utility.

A 3D printed project with embedded NeoPixels was on my mind when I acquired some transparent black PLA filament for an HO scale model train window project. The resulting prints delivered an obscure “glass” with a slightly smoky tint which was perfect for the vintage-style scale windows.
Note: Transparent black is the description provided by the manufacturer of the filament. The material, when printed is not transparent. It is translucent because the light is partially filtered and objects behind the material appear obscured or “blurry” as shown below.
 HO scale factory windows in 3D printed PLA. Transparent black and forest green.
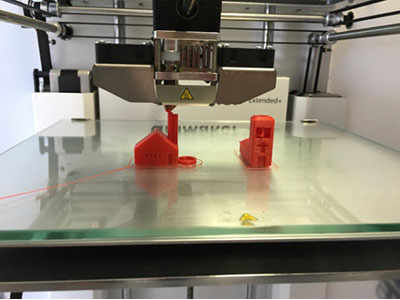
I wondered how NeoPixel light is affected by passing through this new medium. As a claw machine prize chute was also on the workbench and needed a little bling to draw attention, incorporating the translucent black PLA and a strip of NeoPixels was worth a try. The first step was to create a slot (label A) inside the body of the print to house the NeoPixel strip. A step is cut into the slot floor to ensure the strip stays in the back of the slot.
 The progression of embedding objects using a gap-cap to aid adhesion and smooth layer transition.
A programmed pause in the print at the top of the slot allows the insertion of an LED strip (B) followed by a previously printed gap-cap (C). The print is then resumed and completed with the parts securely embedded(D).
Here are the same steps using images:

 Print the gap-cap; then print the main body of the project and insert the LED strip when the print pauses at the programmed layer.

 Install the gap-cap; then press it into the slot so that it is flush with the top of the print in all locations. Resume the print to finish the project.
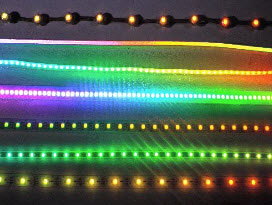
In testing, the LED light passed through the translucent black PLA very nicely without adding unwanted hues to the colors. The smokey tint gave the colors a deeper appearance and obscured the LEDS while diffusing and spreading out the light better than a clear cover.
 Final 3D print illuminated with an embedded NeoPixel strip behind translucent black PLA.
The printer had no trouble spanning the slot and covering the cap with the next layers of filament.
View Video Below
Embedding Objects Inside a 3D Print