XRP Robotics Platform Kit - Unboxing | DigiKey
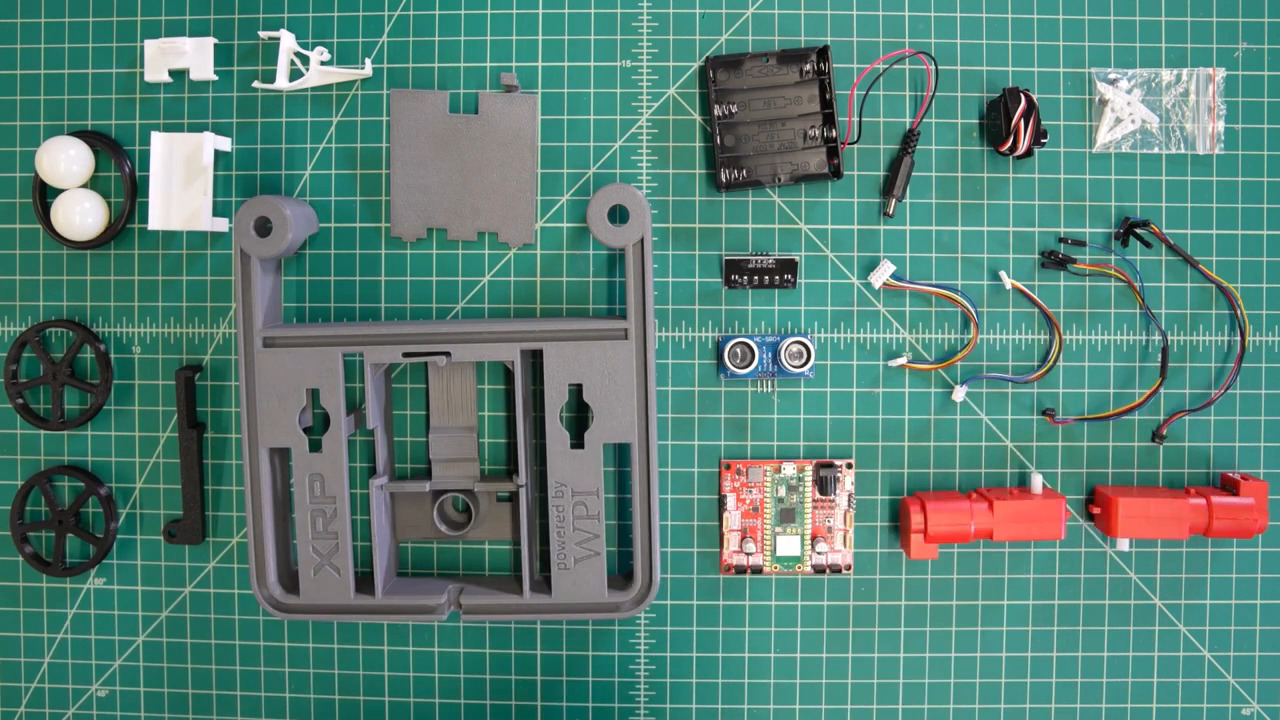
Inside the box you’ll find the XRP controller board, the chassis with attachment hardware, one servo with a servo arm, an ultrasonic distance sensor, a custom line follower board, two motors with encoder, wheels with o rings, two casters, two Qwiic cables, a battery holder, and an XRP sticker sheet.
https://www.digikey.com/en/products/detail/sparkfun-electronics/KIT-22296/19117674
The XRP controller board has a Raspberry Pi Pico W MCU with wireless communication capability, a pair of dual H bridge motor drivers , an accelerometer and gyroscope IC, 4 motor connectors, and 2 servo connectors. The XRP platform provides resources accessible on the XRP home page. Including online courses, 3D printing files for adding attachments, an XRP community, and a GitHub Repository.
Here, we’ll demonstrate the drive train and servo capability using the XRP Visual Block Editor. First, assemble your XRP by following the direction’s on Sparkfun's Youtube channel. Next, connect your assembled XRP kit to your PC using a micro USB. Then go to the online XRP Code Environment and click connect XRP.
In the XRP Code Environment, you have the option to use block coding or Micro Python text coding. Select BLOCKLY on the left to start with block coding. Drag and drop each block to build your code. Select a drive train command and choose a distance to travel. Select servos and set it to the servo connection you're using and adjust the angle of rotation. Under logic, select a sleep block to give the servo time to rotate. When your code is complete click file and save to XRP.
Now you can test your XRP.
Maker.io - https://www.digikey.com/en/maker DigiKey’s Blog – TheCircuit: https://www.digikey.com/en/blog Connect with DigiKey on Facebook: https://www.facebook.com/digikey.electronics/ And follow us on X: https://twitter.com/digikey DigiKey's Main YouTube channel - https://www.youtube.com/@digikey
00:00 Intro 00:24 Inside the box 00:47 XRP controller 01:03 Online resources 01:15 Demo 02:27 Outro