制造商零件编号 ESP32-S3-DEVKITC-1-N32R8V
ESP32-S3-WROOM-2-N32R8V DEV BRD
Espressif Systems
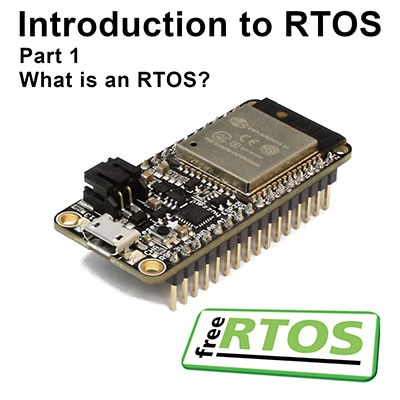
When working with embedded systems, developers often face the challenge of managing tasks that require quick responses, such as reacting to button presses, sensor readings, or other hardware events. Interrupts are an essential tool in handling these real-time tasks efficiently. However, interrupts come with their own complexities and limitations, which is where workqueues (or work queues) in Zephyr can help bridge the gap. In this post, we’ll discuss why interrupts are necessary, how they work, and how Zephyr’s workqueues provide a robust mechanism for handling tasks that need to be deferred or debounced.
At the end of the video, you are given a challenge to implement a Zephyr workqueue to call a function whenever a button is pressed and use it to debounce the button. This written tutorial acts a solution to that challenge and describes how workqueues operate.
Code for this Zephyr series can be found here: https://github.com/ShawnHymel/introduction-to-zephyr
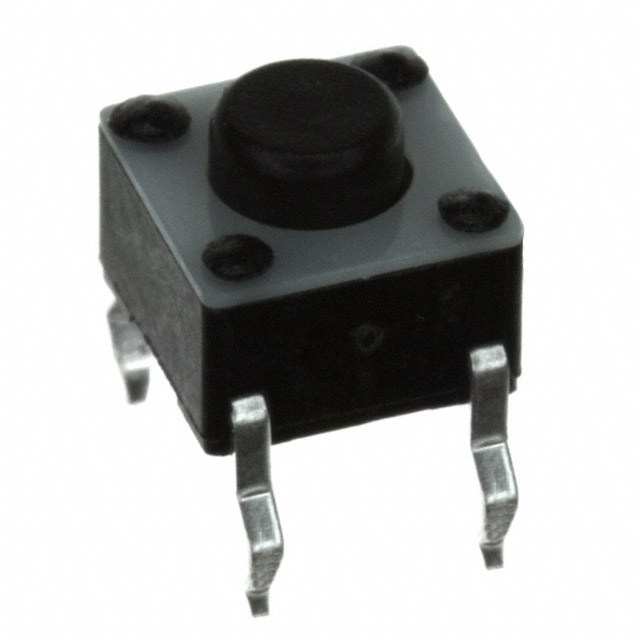
For this demonstration, we will use a pushbutton switch connected to pin 5 on the ESP32-S3-DevKitC.Here is a Fritzing diagram showing all of the connections we will use throughout this series:

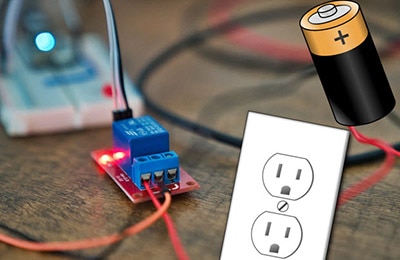
Interrupts allow computing systems to respond immediately to external or internal events. For instance, a button press might generate an interrupt signal, which tells the processor to temporarily pause its current task and execute a specific Interrupt Service Routine (ISR) to handle the event. This approach ensures low-latency responses, making interrupts vital for time-sensitive applications.
However, ISRs need to be minimal and efficient. Long or complex operations in an ISR can lead to issues like interrupt latency, where subsequent interrupts are delayed, potentially causing the system to miss critical events. This limitation calls for a way to offload longer operations from the ISR to a context where they can be handled without affecting real-time performance.
Most microcontrollers implement two basic types of counters:
Interrupts can also be hardware-based (like our timers) or software-based (such as a divide-by-zero error). Interrupts (of all varieties) are extremely important to most embedded systems, as it allows them to process events in a deterministic fashion quickly. They are widely used for things like controlling motors, transferring data to and from external devices, and responding to user input.
Zephyr has two different types of timer interrupts:
Zephyr offers a number of common APIs for working with external interrupts, including executing ISRs for GPIO pin changes, UART, SPI, I2C, etc. Each subsystem (e.g., interrupt-driven UART) will have its own information about how to configure interrupts for that subsystem.
This example shows a barebones Zephyr GPIO interrupt (edge-to-active). Note that one issue with the example is that it is prone to button bounce. There are a number of ways to debounce a button, and we’ll look at one such way in the next section.
Workqueues (also spelled “work queues”) provide a mechanism to defer tasks from an ISR to the system’s thread context. This allows the ISR to remain lightweight while ensuring more complex or time-consuming operations are executed later. In Zephyr, work queues operate in the kernel context and process work items sequentially, making them ideal for tasks like debouncing buttons or handling non-critical operations triggered by interrupts.
This is similar to setting a global flag in an ISR and having the main thread execute some task when that flag is set. The difference is that we can do this with multiple ISRs and functions without the need for manually setting flags. It essentially places a function in a queue to be executed by a worker thread.
To understand how work queues function in practice, let’s explore a demo application where we debounce a button press using a work queue. The full code for this solution can be found here.
Create a new project directory structure:
 /workspace/apps/09_solution_workqueue/
├─ boards/
│ └─ esp32s3_devkitc.overlay
├─ src/
│ └─ main.c
├─ CMakeLists.txt
└─ prj.conf
We will use the same boilerplate CMakeLists.txt file that we’ve been using for most of the series:
cmake_minimum_required(VERSION 3.22.0)
find_package(Zephyr REQUIRED HINTS $ENV{ZEPHYR_BASE})
project(button_demo)
target_sources(app PRIVATE src/main.c)
prj.conf
Leave empty. Workqueues (and the associated default workqueue thread) are enabled by default in Zephyr.
We need to enable our button connected to pin 5:
/ {
aliases {
my-button = &button_1;
 };
buttons {
compatible = "gpio-keys";
// debounce-interval-ms = <50>;
button_1: d5 {
gpios = <&gpio0 5 (GPIO_ACTIVE_LOW | GPIO_PULL_UP)>;
 };
 };
 };
Here is the complete application code for our demonstration:
#include <stdio.h>
    #include <zephyr/kernel.h>
    #include <zephyr/drivers/gpio.h>

    // Settings
    #define DEBOUNCE_DELAY_MS 50

    // Button struct (from Devicetree)
    static const struct gpio_dt_spec btn = GPIO_DT_SPEC_GET(DT_ALIAS(my_button), gpios);

    // Struct for holding GPIO-related callback functions
    static struct gpio_callback btn_cb_data;

    // Struct for holding the workqueue
    static struct k_work_delayable button_work;

    // GPIO callback (ISR)
    void button_isr(const struct device *dev,
                    struct gpio_callback *cb,
                    uint32_t pins)
    {
        // Add work to the workqueue
        k_work_reschedule(&button_work, K_MSEC(DEBOUNCE_DELAY_MS));
    }

    // Work handler: button pressed
    void button_work_handler(struct k_work *work)
    {
        int state;

        // Read the state of the button (after the debounce delay)
        state = gpio_pin_get_dt(&btn);
        if (state < 0) {
            printk("Error (%d): failed to read button pin\r\n", state);
        } else if (state) {
            printk("Doing some work...now with debounce!\r\n");
        }
    }

    int main(void)
    {
        int ret;

        // Initialize work item
        k_work_init_delayable(&button_work, button_work_handler);

        // Make sure that the button was initialized
        if (!gpio_is_ready_dt(&btn)) {
            printk("ERROR: button not ready\r\n");
            return 0;
        }

        // Set the button as input (apply extra flags if needed)
        ret = gpio_pin_configure_dt(&btn, GPIO_INPUT);
        if (ret < 0) {
            printk("ERROR: could not set button to input\r\n");
            return 0;
        }

        // Configure the interrupt
        ret = gpio_pin_interrupt_configure_dt(&btn, GPIO_INT_EDGE_TO_ACTIVE);
        if (ret < 0) {
            printk("ERROR: could not configure button as interrupt source\r\n");
            return 0;
        }

        // Connect callback function (ISR) to interrupt source
        gpio_init_callback(&btn_cb_data, button_isr, BIT(btn.pin));
        gpio_add_callback(btn.port, &btn_cb_data);

        // Do nothing
        while (1) {
            k_sleep(K_FOREVER);
        }

        return 0;
    }
In the Docker container, build the demo application:
cd /workspace/apps/09_solution_workqueue/ west build -p always -b esp32s3_devkitc/esp32s3/procpu -- -DDTC_OVERLAY_FILE=boards/esp32s3_devkitc.overlay
On your host computer, flash the application (replace <PORT>
python -m esptool --port " " --chip auto --baud 921600 --before default_reset --after hard_reset write_flash -u --flash_size detect 0x0 workspace/apps/09_solution_workqueue/build/zephyr/zephyr.bin
After flashing completes, open a serial port:
python -m serial.tools.miniterm "<PORT>" 115200
Press the button connected to pin 5, and you should see "Doing some work...now with debounce!” appear in the console. Because we added a delay to the work callback function (and checked the button state again), you should no longer see repeat actions on a single button press–we successfully debounced with the workqueue!
Let’s break down some of the code.
The gpio_dt_spec structure retrieves the button’s configuration from the Devicetree. This ensures that the button’s pin and properties are initialized correctly.
static const struct gpio_dt_spec btn = GPIO_DT_SPEC_GET(DT_ALIAS(my_button), gpios);
The gpio_pin_configure_dt function is then used to set the button as an input pin.
We configure the button to trigger an interrupt on an active edge (button press) using gpio_pin_interrupt_configure_dt. This ensures that our ISR is called whenever the button is pressed.
The button_isr function is called whenever the interrupt is triggered. Instead of handling the button press directly, it defers the work by scheduling a delayed work item to the work queue:
k_work_reschedule(&button_work, K_MSEC(DEBOUNCE_DELAY_MS));
The DEBOUNCE_DELAY_MS ensures that only button presses sustained beyond this delay are processed, effectively debouncing the input.
The button_work_handler function executes in a thread context after the debounce delay. It reads the button state and performs the desired action:
state = gpio_pin_get_dt(&btn);
 if (state) {
 printk("Doing some work...now with debounce!\r\n"); }
This approach keeps the ISR lightweight and offloads the debounce logic and state checking to the workqueue.
Finally, the main function puts the system into an infinite sleep loop:
while (1) {
 k_sleep(K_FOREVER);
 }
This ensures that the system remains active but does not consume unnecessary CPU cycles.
Zephyr’s workqueues are a powerful tool for embedded developers. They allow you to defer and manage tasks efficiently, reducing ISR complexity while maintaining real-time responsiveness. The example above demonstrates how to debounce a button using a work queue, but the same principles can be applied to other scenarios, such as processing sensor data or triggering state changes in your application. By combining interrupts and work queues, you can build robust, responsive embedded systems.
If you would like to learn more about Zephyr Interrupts and Workqueues, check out the following content:
Circuit Dojo’s Threads, Work Queues, and Timers video