制造商零件编号 U109
UNIT CAM WI-FI CAMERA (OV2640)
M5Stack Technology Co., Ltd.
License: General Public License Arduino
*Thanks for the source code and project information provided by Daniel Rossi
Things used in this project
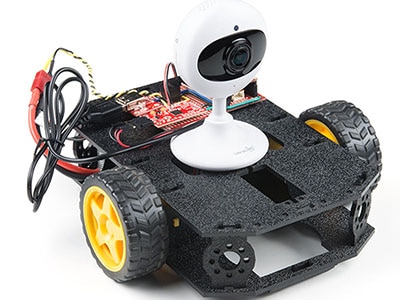
M5Stack ESP32 Camera Module Development Board×1
SparkFun FTDI Basic Breakout - 5V×1
Software apps and online services
Story
It was not easy at all, I went around various forums and various blogs to figure out how to connect to ESP32-CAM remotely via python, and I finally succeeded!
Many of the guides you find on the web recommend very complicated solutions that almost always don't work. I chose to make it easier by "hacking" the code in the example file provided by Espressif.
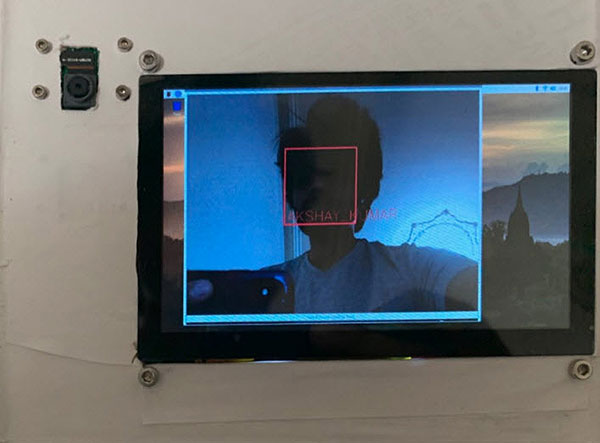
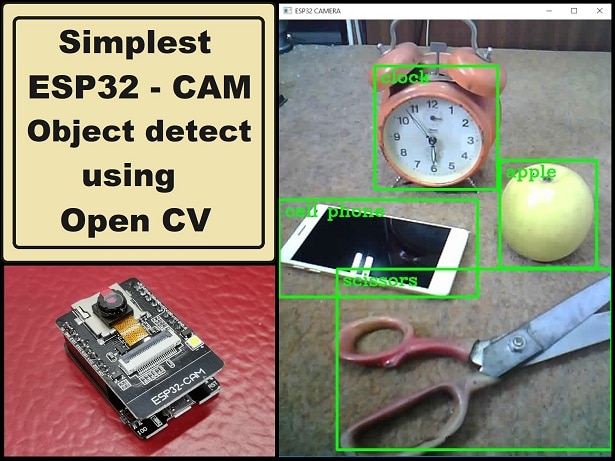
Through this guide I will give you the ability to connect to the ESP32 equipped with a camera, via python. From here you will have carte blanche, I in the example file I am going to perform face recognition. Also, via the URL used by OpenCV to connect, you should be able to use the ESP32-CAM via home assistant (I haven't tested this yet because I don't have a Raspberry Pi at the moment).
Are you ready? Let's get started!
ESP32-CAM Code
As I have already anticipated, many online guides provide you with code examples customized by them in order to access the stream. You don't know how much time I've wasted trying to get them to work without success, so I thought I'd keep it as simple as possible.
The code you will need to upload to your ESP32-CAM is the example sketch provided by Espressif! So, click on "File, " then go to "Examples, " and look for the "ESP32" entry. In the menu you should find the "Camera" section, with the example file called "CameraWebServer" inside.
ESP-CAM code we are going to use
At this point, the only things you need to change within the file are: ssid, password, and the camera model. Enter SSID and PASSWORD of your home Wi-Fi network, and as the camera model choose "CAMERA_MODEL_AI_THINKER", commenting out all other camera model "define" directives.
ESP-CAM Code to upload
Once the sketch has been modified, all we need to do is upload it to ESP32. First, however, we need to set the type of board we are going to use from the available Arduino boards. So go to "Tools", then to "Board", head to "ESP32 Arduino" and choose "ESP Wrover Module".
You can also choose "AI Thinker ESP32 Cam", however, I have noticed that it is worse from a performance point of view, especially in terms of framerate.
In any case, set the loading speed to "512000, " the flash frequency to "80MHz, " and as partition scheme choose "Huge APP (3MB No OTA/1MB SPIFFS)"
To flash the Firmware, you must connect "Pin 0" to "GND", otherwise it won't work
ESP32-CAM Board
Now upload the sketch, half the work is done!
Python Code with OpenCV
First of all, if you are not a python expert, I suggest you look at a guide on how virtual environments work, how to install python and its packages.
As a virtual environment manager, I recommend you use Anaconda. As an IDE instead I use VSCode. The python packages we are going to use you can install them this way:
pip install requests
pip install opencv-python
pip install opencv-contrib-python
You can also find the code we are going to execute on my GitHub profile! If you find this guide useful, I only ask you the favor of leaving a star at the repository.
Within the code you will need to change a few things. First, the URL we are going to connect to:
URL = "http://192.168.1.1"
the IP address you see here is an example, you will need to enter the IP address of your ESP32-CAM. You can find it by opening the serial monitor and clicking on the RESET button on the board. When you enter the URL, don't just enter the IP address! The IP address should always be preceded by "http://".
I will now explain how I got it to work. Basically, I went to see inside the esp_camera library, the original Espressif library, how the WebServer was managed. Nevertheless, you will not find as much information here. To understand how the WebServer works you need to go to "app_httpd.cpp"
In fact, in here we can see what services they make available with the WebServer, and then we can see what the Handlers that manage them do!
void startCameraServer(){
httpd_config_t config = HTTPD_DEFAULT_CONFIG();
httpd_uri_t index_uri = {
.uri       = "/",
.method    = HTTP_GET,
.handler   = index_handler,
.user_ctx  = NULL
};
httpd_uri_t status_uri = {
.uri       = "/status",
.method    = HTTP_GET,
.handler   = status_handler,
.user_ctx  = NULL
};
httpd_uri_t cmd_uri = {
.uri       = "/control",
.method    = HTTP_GET,
.handler   = cmd_handler,
.user_ctx  = NULL
};
httpd_uri_t capture_uri = {
.uri       = "/capture",
.method    = HTTP_GET,
.handler   = capture_handler,
.user_ctx  = NULL
};
httpd_uri_t stream_uri = {
.uri       = "/stream",
.method    = HTTP_GET,
.handler   = stream_handler,
.user_ctx  = NULL
};
As you can see from the code, the streaming service is at the url "http://192.168.x.x:81/stream". You can also see this by opening the WebServer on any web page, right-clicking on the stream and clicking on "open image in another tab".
To change the WebServer parameters, we must instead send HTTP GETs to the "/control" service. Specifically, the GET is formed as follows "192.168.x.x/control?var=PARAMETER&val=VALUE".
You can also see the list of parameters you can change by opening the WebServer Web page and clicking on the "F12" key, analyzing the HTML source code. Nevertheless, I found a quicker method: enter the string "http://192.168.x.x/status" on the browser, and it will list all the parameters you can change.
Within the python file I added some examples on how to modify them. I have not included them all, however, you can do it yourself by following these examples.
I hope you found this guide useful, in case I just ask you to leave a like on the Post and a Star at the GitHub repository!
Code
ESP32_CAM_PYTHON_STREAM_OPENCV.py Python
run this code on your computer for accessing remotely to the ESP CAM
import cv2
import numpy as np

import requests

'''
INFO SECTION
- if you want to monitor raw parameters of ESP32CAM, open the browser and go to http://192.168.x.x/status
- command can be sent through an HTTP get composed in the following way http://192.168.x.x/control?var=VARIABLE_NAME&val=VALUE (check varname and value in status)
'''

# ESP32 URL
URL = "insert here the Esp-cam URL, eg. http://192.168.1.1"
AWB = True

# Face recognition and opencv setup
cap = cv2.VideoCapture(URL + ":81/stream")
face_classifier = cv2.CascadeClassifier('haarcascade_frontalface_alt.xml') # insert the full path to haarcascade file if you encounter any problem

def set_resolution(url: str, index: int=1, verbose: bool=False):
    try:
        if verbose:
            resolutions = "10: UXGA(1600x1200)\n9: SXGA(1280x1024)\n8: XGA(1024x768)\n7: SVGA(800x600)\n6: VGA(640x480)\n5: CIF(400x296)\n4: QVGA(320x240)\n3: HQVGA(240x176)\n0: QQVGA(160x120)"
            print("available resolutions\n{}".format(resolutions))

        if index in [10, 9, 8, 7, 6, 5, 4, 3, 0]:
            requests.get(url + "/control?var=framesize&val={}".format(index))
        else:
            print("Wrong index")
    except:
        print("SET_RESOLUTION: something went wrong")

def set_quality(url: str, value: int=1, verbose: bool=False):
    try:
        if value >= 10 and value <=63:
            requests.get(url + "/control?var=quality&val={}".format(value))
    except:
        print("SET_QUALITY: something went wrong")

def set_awb(url: str, awb: int=1):
    try:
        awb = not awb
        requests.get(url + "/control?var=awb&val={}".format(1 if awb else 0))
    except:
        print("SET_QUALITY: something went wrong")
    return awb

if __name__ == '__main__':
    set_resolution(URL, index=8)

    while True:
        if cap.isOpened():
            ret, frame = cap.read()

            if ret:
                gray = cv2.cvtColor(frame, cv2.COLOR_BGR2GRAY)
                gray = cv2.equalizeHist(gray)

                faces = face_classifier.detectMultiScale(gray)
                for (x, y, w, h) in faces:
                    center = (x + w//2, y + h//2)
                    frame = cv2.rectangle(frame, (x, y), (x + w, y + h), (255, 255, 0), 4)

            cv2.imshow("frame", frame)

            key = cv2.waitKey(1)

            if key == ord('r'):
                idx = int(input("Select resolution index: "))
                set_resolution(URL, index=idx, verbose=True)

            elif key == ord('q'):
                val = int(input("Set quality (10 - 63): "))
                set_quality(URL, value=val)

            elif key == ord('a'):
                AWB = set_awb(URL, AWB)

            elif key == 27:
                break

    cv2.destroyAllWindows()
    cap.release()