制造商零件编号 2169
ROUND 5V LED MATRIX LAMP
Kitronik Ltd.
License: See Original Project Laser Cutters Solder / Desoldering
In this resource, we show you how to make a cool Scandinavian style lampshade using our sustainable 3mm laser cork. One of the great things about making things out of our laser cork is that it's flexible, this means all the parts stay together with a friction fit. So, no glue, no screws, just cork!
We love Cork! As well as being highly versatile it's also one of the most sustainable materials available. When a tree is harvested for its bark, the tree continues to grow and is then left to recover. Also, Cork is 100% recyclable so none of it needs to go to waste. Follow our step-by-step guide for a sustainable lighting solution!
STEP ONE - Gather the parts:
USB Power Lead
3mm Laser Cork, 600mm x 400mm sheet
You will also need:
Access to a laser cutter
A USB Power Source
STEP TWO - Download the Files:
Download your laser files here.
STEP THREE - Cut Out the Parts:
Place your material into the laser cutter, import the laser file, choose your settings and away you go! We found Speed: 50 Power: 65 worked best with our laser cutter, but yours may be different. Tip: We recommend doing a quick test cut first in one of the corners.
STEP FOUR - Building the 5V LED matrix Kit:
Solder together your Round 5V LED matrix following the instructions, which can be found here.
STEP FIVE - Soldering the USB Power Cable:
You should now have only two pads left to solder, marked RED + and BLACK -. Using the hole as strain relief, thread the wires through the hole and then into the relevant pads. Then, solder in place.
STEP SIX - Assembling the Cork Lamp Shade:
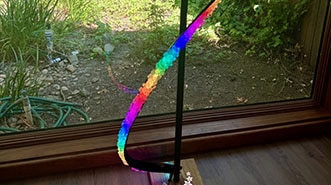
First, feed the USB cable through the large hole in the small circular panel. Assemble half of the lampshade, followed by the LED Matrix Board as shown in the first picture.
All the parts should make a friction fit with each other and remain in place. If you find some of the sections are loose, don't worry, we can add a rubber band around the lampshade later to hold everything together. Once you have the LED Matrix board in place, add the rest of the sides.
STEP SEVEN- Finalize and Then Test:
Loop the cable around the cut-out in the top panel and find a USB power source to test out your new Scandinavian inspired lamp!
Before You Go:
Like our content? Make sure you sign up for our newsletter, so you don't miss out on new products and information! Click here to sign up.
©Kitronik Ltd – You may print this page & link to it but must not copy the page or part thereof without Kitronik's prior written consent.