制造商零件编号 CDS-20144-L100
SPEAKER 4OHM 1W TOP PORT 92DB
Same Sky (Formerly CUI Devices)
License: Attribution 3D Printing Bluetooth / BLE Solder / Desoldering Speakers
Overview
The motivation behind this project was that the AirTag is an excellent product in my opinion, but it is limited in that the form factor of the device prioritizes it being used on something like a keychain rather than slipped into a pocket or sleeve in a wallet. As someone who has found the AirTag to be exceedingly helpful in finding my keys, I found myself wishing that I could find my wallet the same way. The issue is that I carry a standard leather wallet, and the 8mm thick rounded AirTag left a noticeable bulge in my wallet that I didn't like, so I decided to engineer a solution!
Research
I spent some time researching to see if anyone had done something similar, and I first stumbled across a reverse engineering guide of the AirTag by a person who was developing a device that also used Bluetooth Low Energy (BLE) and that guide proved to be exceedingly useful in my design. Here is a link to that article by Adam Catley.
Next, I looked to YouTube to see if there was a guide or a video that walked through the process of removing the PCB from the case. Since I knew there was a good chance of glue and hidden clips, I wanted to ensure I knew exactly where they were so I could minimize damage to components that I would need to preserve (antennas and solder pads).
Building my own version
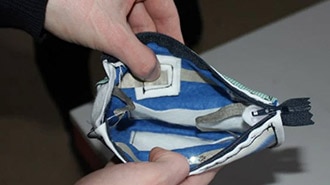
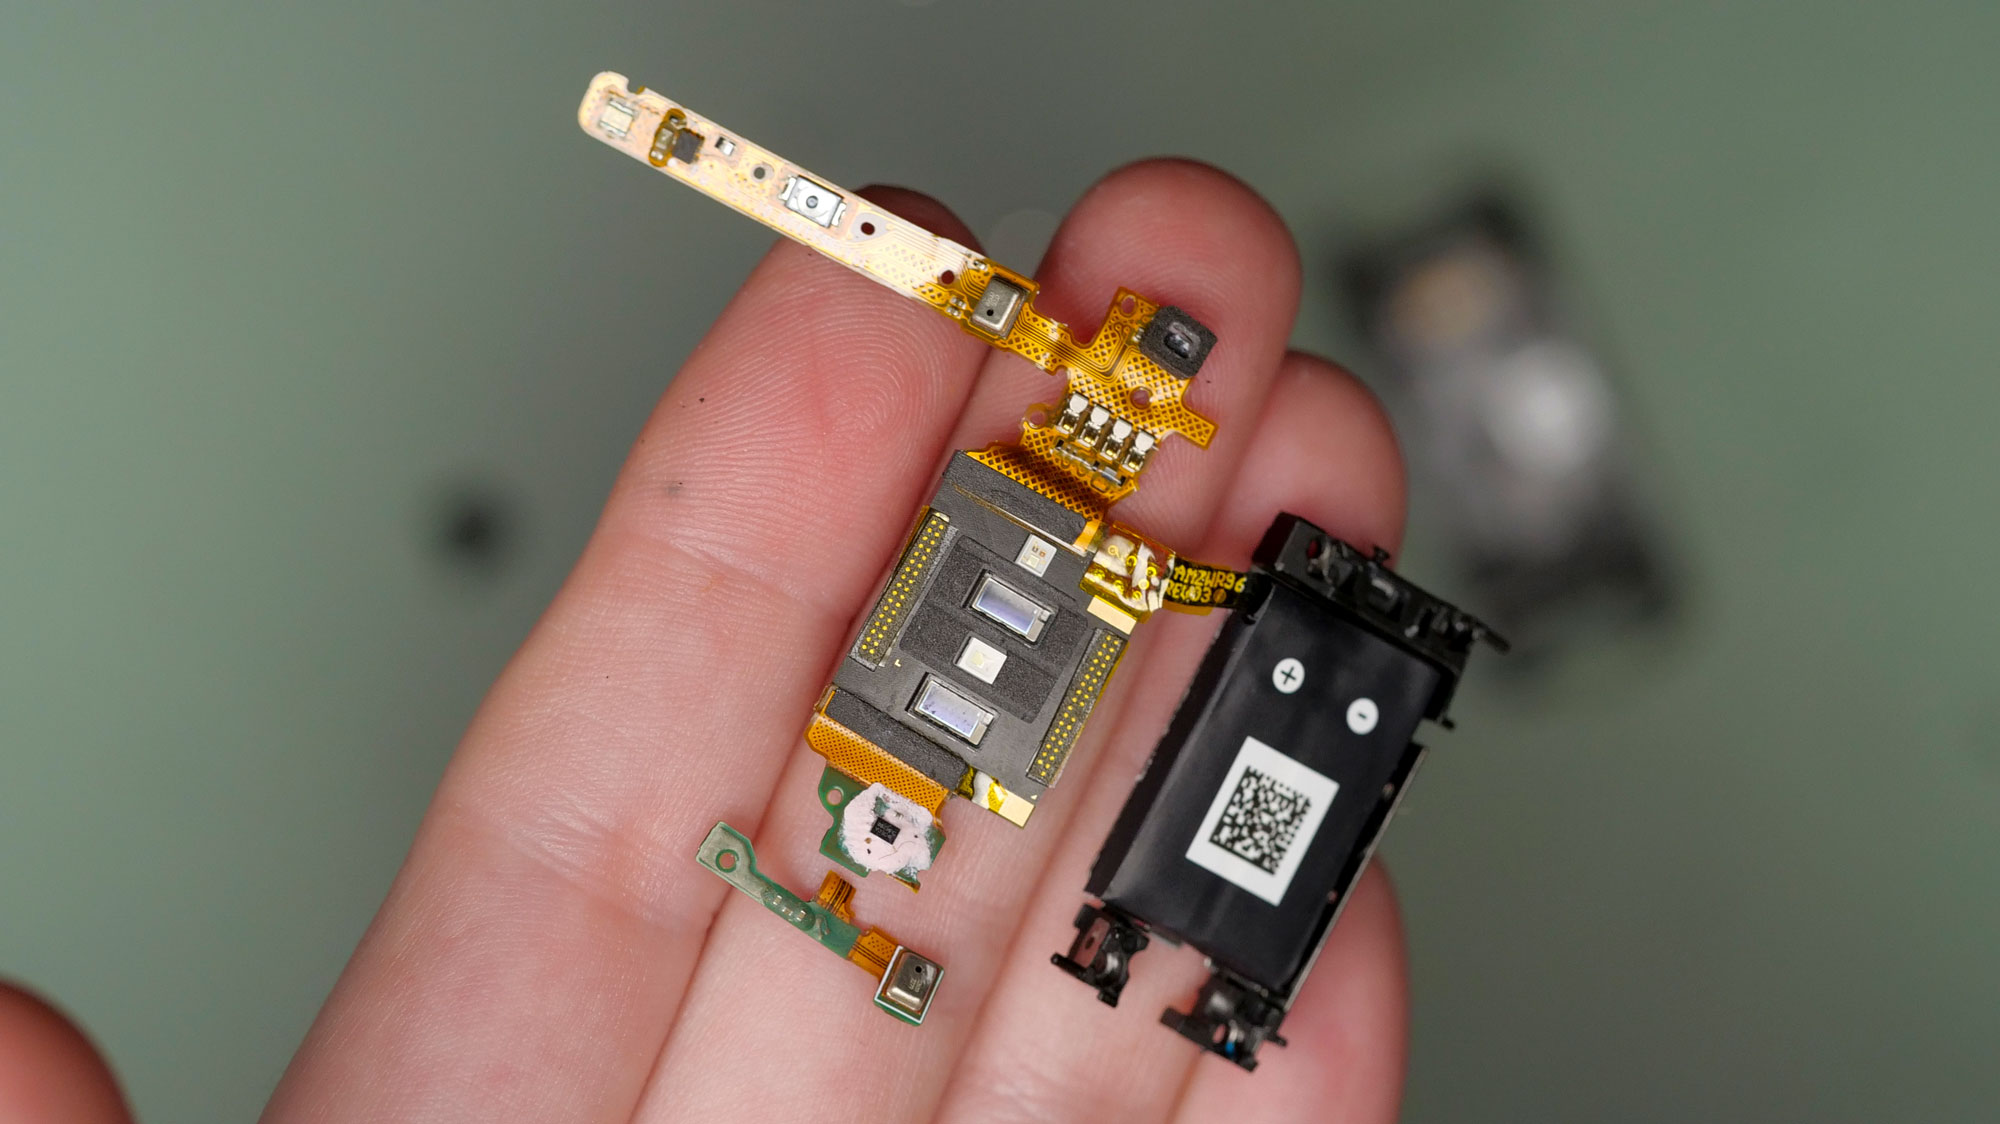
After my research, I purchased an AirTag and decided to go ahead and attempt disassembly. I was pleasantly surprised by the fact that there was less glue than I expected, and no hidden clips at all that retained the PCB in the case. The glue was able to be removed with heat, and I found 100 degrees Celsius to be a good setting on my heat gun to be able to pick away the glue.
Once the glue was removed, the next step was to solder the speaker and power wires to the board. Adam Catley's guide proved to be quite useful since all of the test pads were labeled. I was able to find a speaker (linked below) on Digi-Key's website that ended up being perfect for the job and decently loud too.
Finally, I designed a simple 3d printed case and my final design ended up being just about 4mm. That's a 50% reduction in thickness! The device fits great in my wallet now and uniformly increases the thickness of my wallet rather than creating that awkward and uncomfortable circular bulge.
If I had to do this all over again, I would probably add rounded edges to the case. Other than that, I am really happy with how this project turned out!
Check out the video for more details on how I went through each step, it's one of the most comprehensive "How to guides" on AirTag reverse engineering from what I could find. I hope this inspires you to improve on everyday products in your daily life!