制造商零件编号 101991030
HUMAN STATIC PRESENCE LITE RADAR
Seeed Technology Co., Ltd
License: See Original Project Raspberry Pi SBC
Courtesy of Pimoroni
Guide by Pimoroni
We've been getting big into Home Automation recently and have added lots of exciting new smart home products to our shop. If you're new to home automation, bewildered by the choice and would like some pointers of what works nicely with what, then read on for a brief primer.
We'll be covering a couple of different local home automation hub options and showing you how to hook up the Zigbee sensors and devices that we stock. We'll also show you how you can set up a simple automation.
What is home automation?
Home Automation involves making your home 'smart' by getting it to do things automatically based on programmatically defined rules - so you can do cool stuff like turning your lights on when it gets dark or when motion is detected in an area, turning on your coffee maker in the morning or turning down the heating in your bedroom if it gets too warm - once you get started, the possibilities are endless! To be able to do this kind of thing, your devices need to be able to talk to each other - either through the internet or via a hub connected to your local network.
Cloud vs local
Many smart devices that you can buy come with a link to install a proprietary app on your phone to control your devices through 'the cloud'. Advantages of this method are that it's super quick to get going and you can turn your devices on and off from anywhere (as long as you and they both have an internet connection). However, there are a number of disadvantages to this approach:
You'll typically need a different app for every manufacturer, so getting devices from different ecosystems to talk to each other is often not possible.
As every instruction is transmitted over the internet to a remote server, communication may be slow, or your devices may stop working in case of internet outages.
Depending on the service you're using, there may be data security concerns.
Some manufacturers charge (or decide to start charging!) for their cloud services or for storing historical data.
If a manufacturer stops trading or shuts down its cloud services, it might not be possible to use your devices anymore.
The alternative to using cloud services is installing a smart hub or server in your home so your devices can communicate with each other over your local network. That way, all your data stays safely in your house, and internet connectivity is not required.
Choosing devices
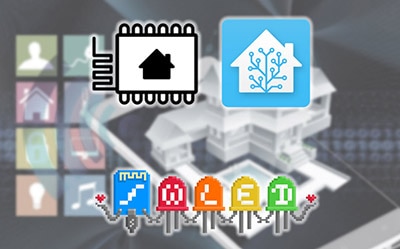
Some sensors and devices are easier to get working over a local network than others - if you're new to home automating we'd recommend starting with Zigbee devices. Zigbee is a low-power, secure radio protocol that's used by many big manufacturers of home automation devices, and it uses clever mesh networking to maintain robust local networks of devices, even if some of them go offline. Zigbee is well supported in home automation software and adding devices is typically very straightforward.
Here's a list of some of the Zigbee devices that we sell that would all be great options to start with:
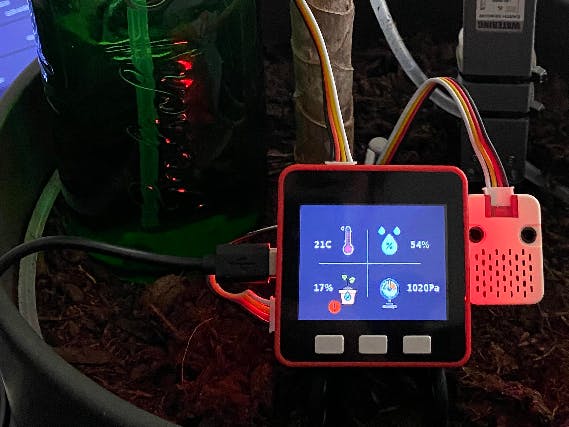
Temperature & Humidity Sensor with LCD
Door/Window Sensor
Motion Sensor
Water Leak Sensor
Wireless Switch
Thermostatic Radiator Valve
USB Switch
You may also want to check out Ikea's range of Zigbee smart home devices - they do some nice ones including RGB LED strips, air quality sensors, and smart air purifiers (look for products that say Zigbee on the box). Philips Hue smart bulbs also use Zigbee under the hood and are generally easy to work with.
Choosing a smart hub
We sell a couple of different smart hubs, or you could build your own. Here's a quick overview of the options.
Sonoff iHost
Sonoff iHost is a smart home hub that is a good choice if you're primarily planning on using it with other Sonoff devices (though it does have some support for devices from other manufacturers). It has a simple interface, is quick to get started with and it can connect to both Wi-Fi and Zigbee devices without the need for additional hardware. It comes with a USB-C cable but not a wall plug, so you'll need to pick up something like this USB-C power supply if you want to plug it into a wall outlet.
Home Assistant Green
If you're up for something with a little more complexity (but a lot more power), check out Home Assistant Green which comes pre-loaded with our favourite smart home hub software - Home Assistant.
We love Home Assistant because it's open source, has a large user base and is very actively developed. It's compatible with many different devices from many different manufacturers and is perfect if you're like us and have amassed quite a collection of random smart devices and want them all to work together. Check out NetworkChuck's video for an introduction the kind of things it can do!
Home Assistant Green comes in a nice enclosure with silent passive cooling and built on fast in eMMC storage, with Home Assistant pre-installed and ready to go straight out of the box. Note that Wi-Fi and Zigbee connectivity is not built-in, so you'll need to pick up a seperate Zigbee USB adapter if you want to use it with Zigbee sensors.
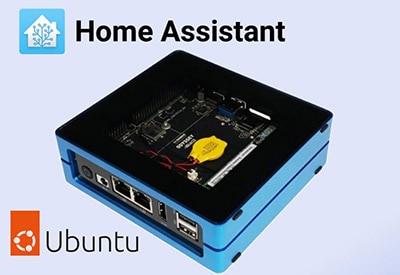
Home Assistant on a Raspberry Pi
Alternatively, Home Assistant will run great on a Raspberry Pi 4 or 5, so you could design your own hardware based on your preferences or make use of kit that you already have. Here's our suggested kit list for building a capable Home Assistant machine using Raspberry Pi 5.
Raspberry Pi 5 (we'd suggest going for 4GB RAM or larger, so you have plenty of RAM to handle lots of devices and integrations)
A micro-SD card (32GB or larger)
Some sort of cooling - for a minimal setup you could add an Active Cooler, or if you'd prefer to keep everything enclosed you could get a case with active and passive cooling built in, like the Argon ONE V5.
USB Zigbee adapter (if you want to use Zigbee sensors). The official Home Assistant one or the Sonoff one will both work (though note that the Sonoff adapter is bigger than the HA one, so it might not fit neatly into all setups).
You could keep all your data on your SD card, but you might also want to consider adding some speedy solid-state storage, with an NVMe Base and SSD or a case that includes NVMe functionality.
Instructions on how to install Home Assistant on your SD card can be found here (TLDR; you can flash it with Raspberry Pi Imager - find it under 'other specific purpose OS').
If you want to install Home Assistant on a NVMe drive, you'll first need to update your Raspberry Pi's firmware to the most recent version. You can do this by installing Raspberry Pi OS on your SD card and following the instructions in this guide. Once that's done, you'll be able install Home Assistant on your SSD using Pi Imager on the Pi or by the network boot utility.
First time setup
Setting up Home Assistant
Comprehensive instructions how to set up and get started with Home Assistant can be found here.
Here's the TLDR; connect your smart home hub to your home router via a wired ethernet connection. Power it up and give it a couple of minutes to get connected - once it's up and running you'll be able to access it by going to http://homeassistant.local:8123/
Adding Zigbee functionality to Home Assistant
If you're using a separate Zigbee USB adapter, plug this into your Raspberry Pi or Home Assistant Green. Our adapter was autodetected and the web interface prompted us to install the Zigbee Home Automation integration. We'd suggest restarting Home Assistant after that (from Settings, the option to restart can be found under the menu at the top right):
Once the integration is installed and running, connecting a new device should be as simple as putting both the device and the Zigbee Home Automation integration into pairing mode, and waiting for the device to be detected.
Setting up Sonoff iHost
Sonoff's instructions for how to get iHost up and going can be found here. Connect it to your router with the ethernet cable and press the power button to turn it on. When the light on the front turns blue it's connected to the network, and you can access the hub's interface by going to http://ihost.local in your web browser.
Adding some sensors
Your new smart hub probably looks pretty empty - so we'd suggest adding some sensors and devices to it!
Putting devices into pairing mode
Many of the battery powered Sonoff sensors ship with plastic battery tabs that you will need to remove to power up the device. When you do that, they will automatically go into pairing mode and an LED somewhere on the device will start flashing. Pairing mode can also be activated manually - the Sonoff devices have a button (some are externally visible; some are hidden within the battery compartment) that you can hold down until the LED starts flashing.
Different manufacturers have different 'secret knocks' for putting their Zigbee devices into pairing mode. The documentation that comes with the device should let you know how to put your device into pairing mode.
Putting Home Assistant into pairing mode
You can tell Home Assistant to start searching for new Zigbee devices by going to Settings > Devices and Services > Add Integration > Add Zigbee Device.
For best results, put your device close to the hub whilst it's pairing - the connection range will be reduced until it's established in the Zigbee mesh network.
Once Home Assistant sees your sensor, it should show up like this:
It can sometimes take a few goes to get the timing right, and we've found some sensors are quicker to pair than others - battery powered ones tend to poll the server less frequently.
After your sensor is successfully paired, it should show up automatically in your default dashboard.
You can give the sensor a more memorable name, change the icon and assign the sensor to an area by clicking on the sensor in the dashboard, and then clicking on the cog:
Putting Sonoff iHost into pairing mode
Pairing devices works in a similar way if you're using a Sonoff iHost. Go to http://ihost.local/ and click on the '+' button at the top right, then choose 'Add Zigbee Device'.
Setting up your first automation
Now that you've got some devices added, you can get to the good stuff - setting up things to happen automatically, so you don't have to use valuable brain power worrying about them anymore.
Setting up automations in Home Assistant
To set up an automation in Home Assistant, go to Settings > Automations & Scenes > Create Automation.
Here's a simple one we've got set up to make an Ikea LED strip light up red when our window is open (so we remember to close it at the end of the day!):
And one to turn it off when the window is closed:
Setting up Automations with Sonoff iHost
Automations are 'scenes' if you're using a Sonoff iHost - that's the second icon down on the menu bar that looks like a cube. You can add a new automation by clicking on the '+' at the top right.
Here's an example of an automation that we've set up to turn our desk lights on when motion is detected by a sensor. The lights are plugged into a USB switch:
And here's an associated automation to turn the lights off when motion is not detected:
Next steps
If you want to learn more about Home Assistant and all the amazing things you can do with it check out the Home Assistant Community forums. You can also come and chat about home automation on our forums or Discord - we'd love to know what you've been automating!
That's all folks!