Arduino Code Libraries with Becky Stern
2023-02-14 | By bekathwia
One of the Arduino community’s biggest superpowers is code libraries– bundles of specialized programming that empower you to leverage complex computing tools using simple commands. Arduino recognizes these add-on modules so you can use their commands within your program.
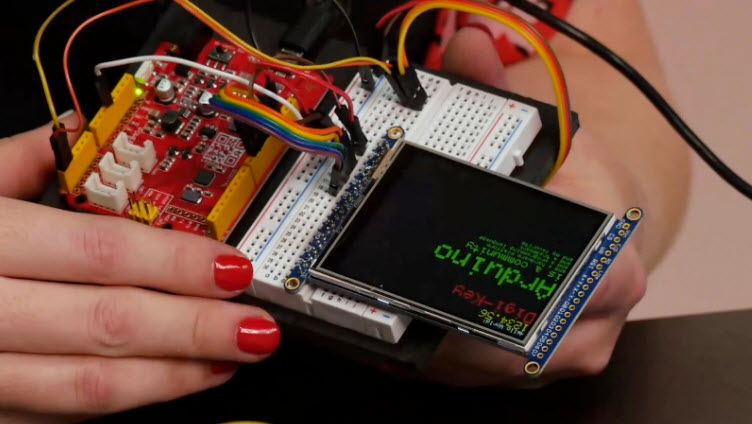
Arduino libraries exist for all sorts of complex tasks. You can use them to control large numbers of LEDs, read sensors, create sounds, manipulate data, write to displays, and much more. Some come built-in with the Arduino software, like the library that allows you to control servo motors. But anyone can publish a library, and there are thousands more you can install.
The board I recommend starting with is the Arduino Uno (1050-1024-ND) or compatibles such as the Adafruit Metro (1528-1214-ND), Sparkfun Redboard (1568-1977-ND), or Seeeduino (102010026-ND).
To build the circuits in this guide, you will need:
- Arduino Uno or compatible, and USB cable
- Solderless breadboard DK #1738-1326-ND
- Jumper wires DK #1528-1967-ND or solid-core hookup wire DK #1528-1743-ND
- WS2812 addressable LED strip (aka NeoPixel strip)
![]()
Let’s start with smart addressable LEDs, a series of controllable LED lights commonly referred to as NeoPixels, which is the Adafruit brand name. Each pixel contains a WS2812 chip which communicates with the Arduino board and other pixels on its strip to determine whether to light up and what color–it can't light up without a controller. To control the strip, some additional Arduino functions are required, which you can get by installing the code library.
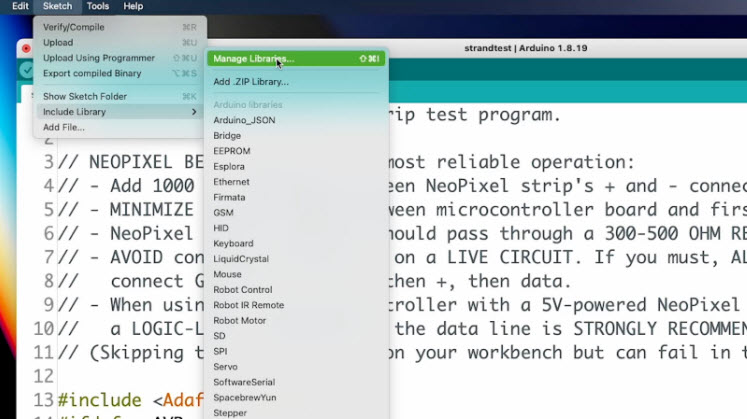
To install libraries, open the Library Manager under Sketch> Include Library>Manage Libraries.
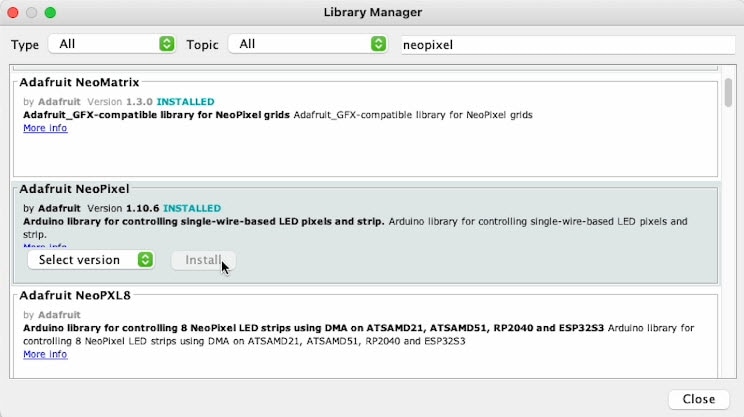
Then search for “NeoPixel” and click Install when you locate the “Adafruit NeoPixel” library. Now you’re all set to use the NeoPixel library in your Arduino sketches! You can use the Library Manager to install new libraries as you need them.

Each pixel in a NeoPixel strip contains a very small RGB LED, which can theoretically create any color of light. However, generating pure white poses a challenge for RGB LEDs and often leaves users disappointed in the tinted or poorly mixed quality of light produced.
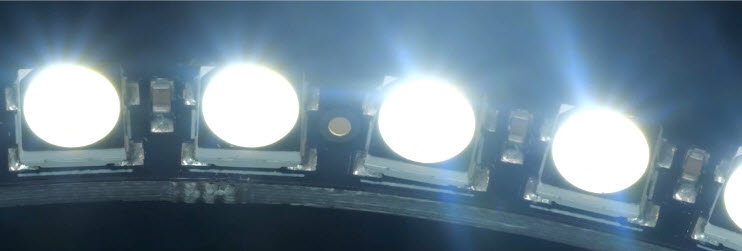
For this reason, there are also RGBW varieties that include a white LED inside their packages as well. Coding for these pixels will include four brightness values to describe a pixel color: red, green, blue, and white.
This is similar to analogWrite(); in the example from earlier in this series: You provide a number from 0-255 to represent the brightness of the LED. The functions in the NeoPixel library take pixel numbers and these color values as arguments and then translate them into the commands to send along the pixels.
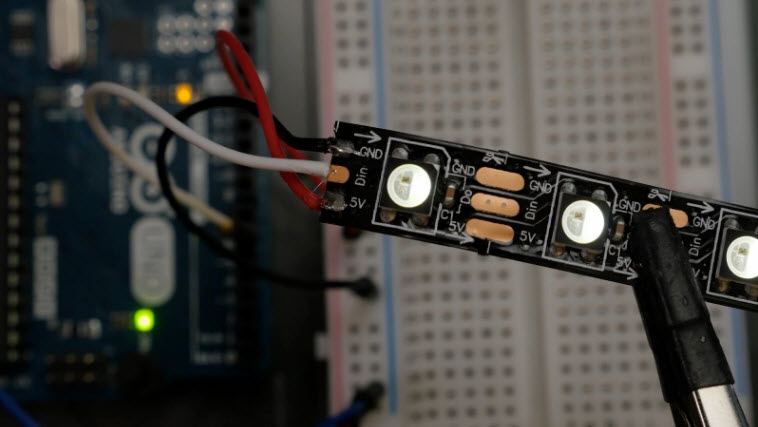
To assemble your circuit, solder wires to the power, ground, and input pins on the pixels and hook up the circuit with the Arduino unplugged.
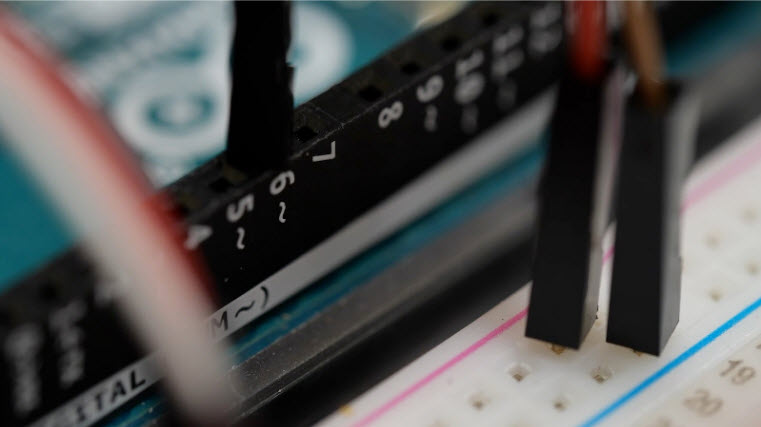
Connect the red 5V wire to the breadboard's power bus and the black ground wire to the breadboard's ground bus. The white data wire connects to Arduino pin 6 since that’s the pin the included code examples use.
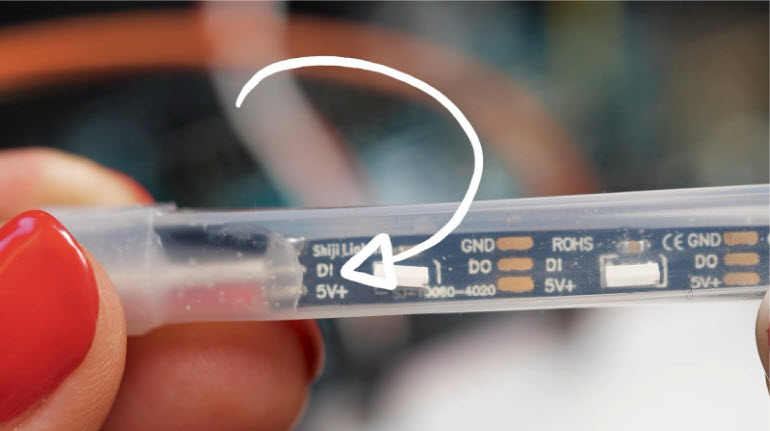
Be sure you are connecting the data line to the input end of the strip, as it won’t work if you connect to the output. Power and ground can be connected anywhere along the strip.
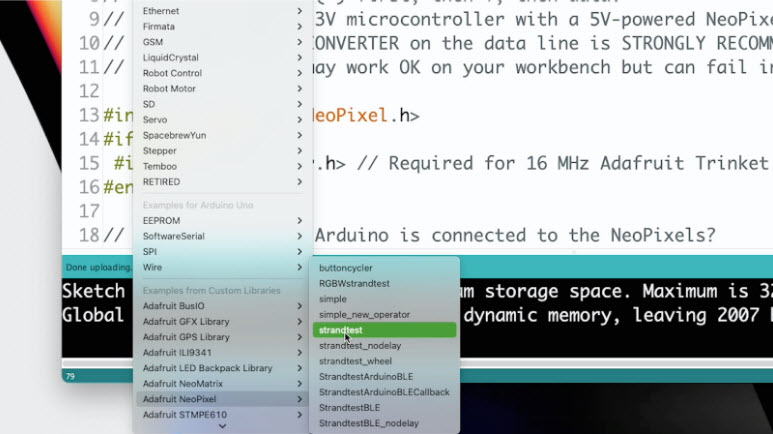
The code examples can be found by going to File>Examples and scrolling to the bottom, where you’ll find a submenu with the library’s name. Open the example called “strandtest.”

The first section instantiates the NeoPixel strip and sets up the configurable bits of the program, like the pins connected to the NeoPixel strip and button, the number of pixels, and the global brightness level.

#define statements are similar to variable declarations but are used for information that does not change while the program is running. They take up less memory than regular variable declarations.

strip.show(); is used any time you want the pixels to change. Setting the pixel colors and showing the latest changes are broken up into two separate commands.

The main loop just calls other functions. The first is colorWipe(), which takes two arguments: a color, and a speed value in milliseconds.

To understand what colorWipe() is doing, find where the function is defined, below the main loop. The function definition starts with what type of data the function will return or send back to the main program. In this case, the function returns nothing, so the word void is used at the start of the definition. Next is the name of the function, which is “colorWipe” in this case. When you’re defining your own functions, you can name them whatever you want!
In the parentheses after the function’s name, you’ll find the arguments the function takes. In this case, there is a 32-bit unsigned integer called "color" and an 8-bit unsigned integer called "wait." Inside the function, these local variables are used to reference the information you passed to it from the main loop (or from another function).
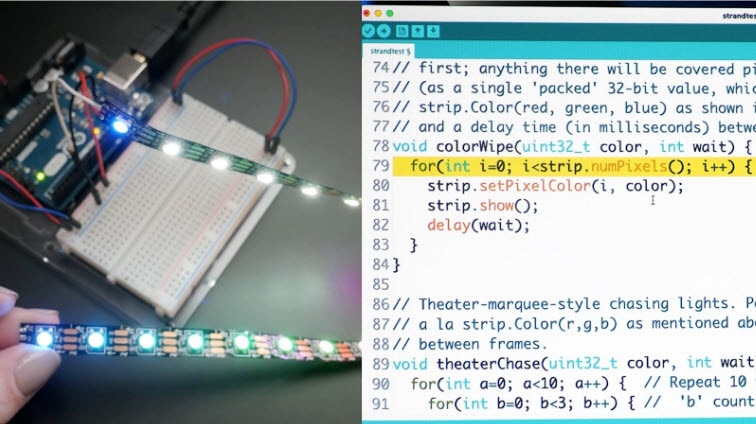
The function itself steps through all the pixels in the strip using a for loop and a NeoPixel library function called strip.numPixels();, coloring and showing each one before moving to the next. The other functions in the strandtest program work the same way and use clever color math to achieve stunning light patterns.

You can easily modify colorWipe() to start coding up your own unique animation. Copy and paste the whole function definition, change the name of the function, and then you can play around with the code. Be sure to call the new function from inside the main loop. If you find an effect you like, you can stop editing that function and move on to a new one. Functions are handy for separating out a chunk of code you want to access repeatedly, and they make your code easier to read.
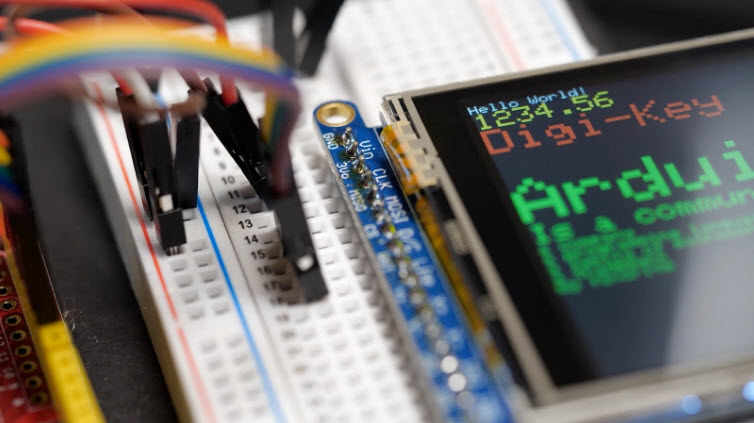
Once you’re comfortable installing libraries and looking up how to use their built-in functions, through the included examples and the library’s documentation, the Arduino world really is your oyster. Moving beyond the basic inputs and outputs we covered in previous episodes, libraries let you easily talk to devices that communicate with data protocols like i2c or SPI. These devices use fewer wires to send and receive complex information.
If you’re feeling overwhelmed by all the new possibilities that opened up to you, check out my guide on translating your Arduino project idea into code. Basically, you can start by getting each individual input and output to work using library example code, and then build up a new program from bits of other samples.

Another thing that is useful to know at this point in your Arduino journey is how to install additional boards. Just like the Library Manager under the Sketch menu, there’s a Boards Manager under the Tools menu. But unlike libraries, the Boards Manager needs to know where to look for the new board info.
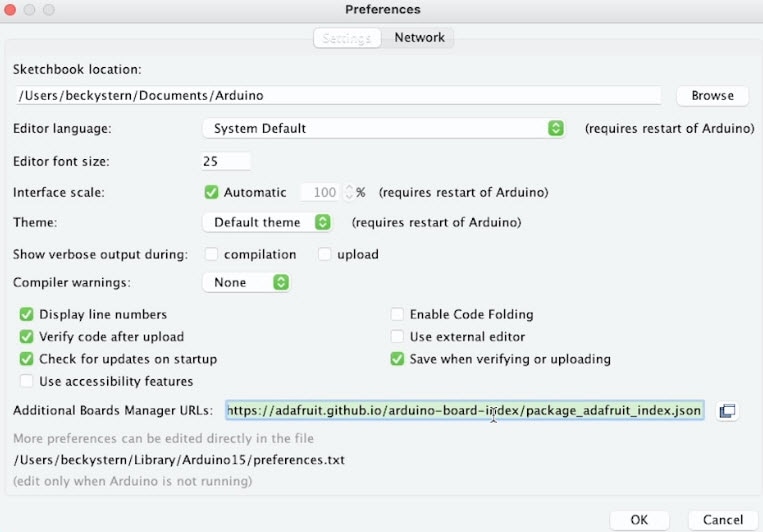
So if you’re installing ESP32 support, for instance, you’d first need to paste the URL for the ESP32 boards info into this field in your Arduino settings. Then the ESP32 Arduino boards will become visible in the boards manager, and you can install them from there. Then restart your Arduino IDE. You can add multiple Boards Manager URLs by separating them with a comma. Sometimes compatible boards will also require the installation of a driver as well, so be sure to read the documentation carefully whenever you’re getting ready to work with a new board.
Check out the rest of this series for even more information on building with Arduino.

Have questions or comments? Continue the conversation on TechForum, DigiKey's online community and technical resource.
Visit TechForum


 中国
中国